Friday, October 24, 2014

Caramel Apple Cookies! Oh My!

Caramel Apple Cookies!
Halloween treat cookies


Green apple flavor and real chewy caramel goodness is what these cookies are all about!


  As I was innocently shopping in JoAnn's craft store last week, I found the most amazing inspiration for a Halloween treat ever!  I say I was innocently shopping because I was really looking for Christmas fabric for a gift when I what to my wondering eyes did appear..ok sorry just got carried away.  There on the shelf was a Wilton "How To.." tablet with these cute caramel apple cookies on it.  I took the picture and reinvented the process, changed their peanut butter/nut sprinkles dip that looks like caramel to the real thing, then sprinkled them with toffee bits.  Then I also came up with a process to make the white chocolate (almond bark)  have the flavor of honest to goodness Green Apples!  Take all that and put a cookie inside and you have these:


Caramel Apple Cookies

First, you need to start with a cookie that can hold it's shape and taste good at the same time. You can use your favorite sugar cookie recipe or use this one. I tested 2 different recipes and found that one worked so much better than the other.  It is from a super blog called Glorious Treats. These are the ingredients:

Rolled Sugar Cookies
3 cups all-purpose flour
1 teaspoon baking powder
1 cup (2 sticks) unsalted butter, room temperature
1 cup sugar
1 large egg
1 teaspoon good quality vanilla extract


You can find her procedure and explanations here.  Please follow the directions and make sure to chill the dough both after mixing and after cutting it out to keep it from spreading when cooked.  Here are some helps from me on how to cut the cookies out into apple shapes. 

After chilling the dough, take it out of the fridge and let it sit for about 5 minutes to become workable.


  Set the dough on a large piece of wax paper (or parchment) and flatten dough ball a little with your hand.  Place a second piece of wax paper over the top.  Using the wax paper helps keep the dough from becoming dry from adding too much flour while rolling it out. 

 Using the method found in the link for Glorious Treats, roll dough to the thickness of 2 paint sticks that have been glued together (4 total sticks) and placed on each side of the dough.  Use a pumpkin cookie cutter to cut apple shapes.
 
  All you have to do is eliminate the stem part and now you have an upside down apple! Because the dough is quite thick you can insert a craft stick into the middle and push down about 2/3 of the way to the bottom.  The stick may not be fully covered when you turn it over so you can patch it with a little flat piece of dough until none of the stick is showing.
Place these on a silpat lined cookie sheet and place in the fridge for a few minutes before baking to prevent spreading.  Remove and cook at 350 degrees for 8-10 minutes or until very lightly browned around the edges.  

When cookies are cool, melt white almond bark in the microwave.  I broke the new bar in 1/2 using 6 squares. It is also nice to put them in a gallon ziplock bag before melting then you don't have to transfer it and wash another bowl.  Melt in 30 second intervals until the bark is almost all melted.  Take the bag out each time and press the lumps out as it becomes possible. Don't go past this point because you don't want it too hot or it will not coat the cookies and stay on them well.  It also takes quite a while to cool down.  When you have only a few soft chunks left, press them out and you are almost ready to "frost" the cookies! 
Use Wilton Candy Colors - Green to color the bark to a light granny smith color.  Add the color to the bag of bark and moosh it around until the color is uniform. Then add the magic ingredient that makes this taste like apples!
Green apple icing
Kool Aid "new" Green Apple!  Not all stores carry this, but I found mine at
Wal Mart.  For each 6 square of Almond Bark I used 1/8 teaspoon of the powder.  After tasting this on the completed apple,  I think I might want to add a little bit more to make the taste stronger, so experiment until you get the taste you like.  The powder is very strong so don't over do!  

Now you are ready to frost! Cut off about 1/8 to 1/4 inch off the corner of the bag and drizzle the bark in swirls over the cookie. 

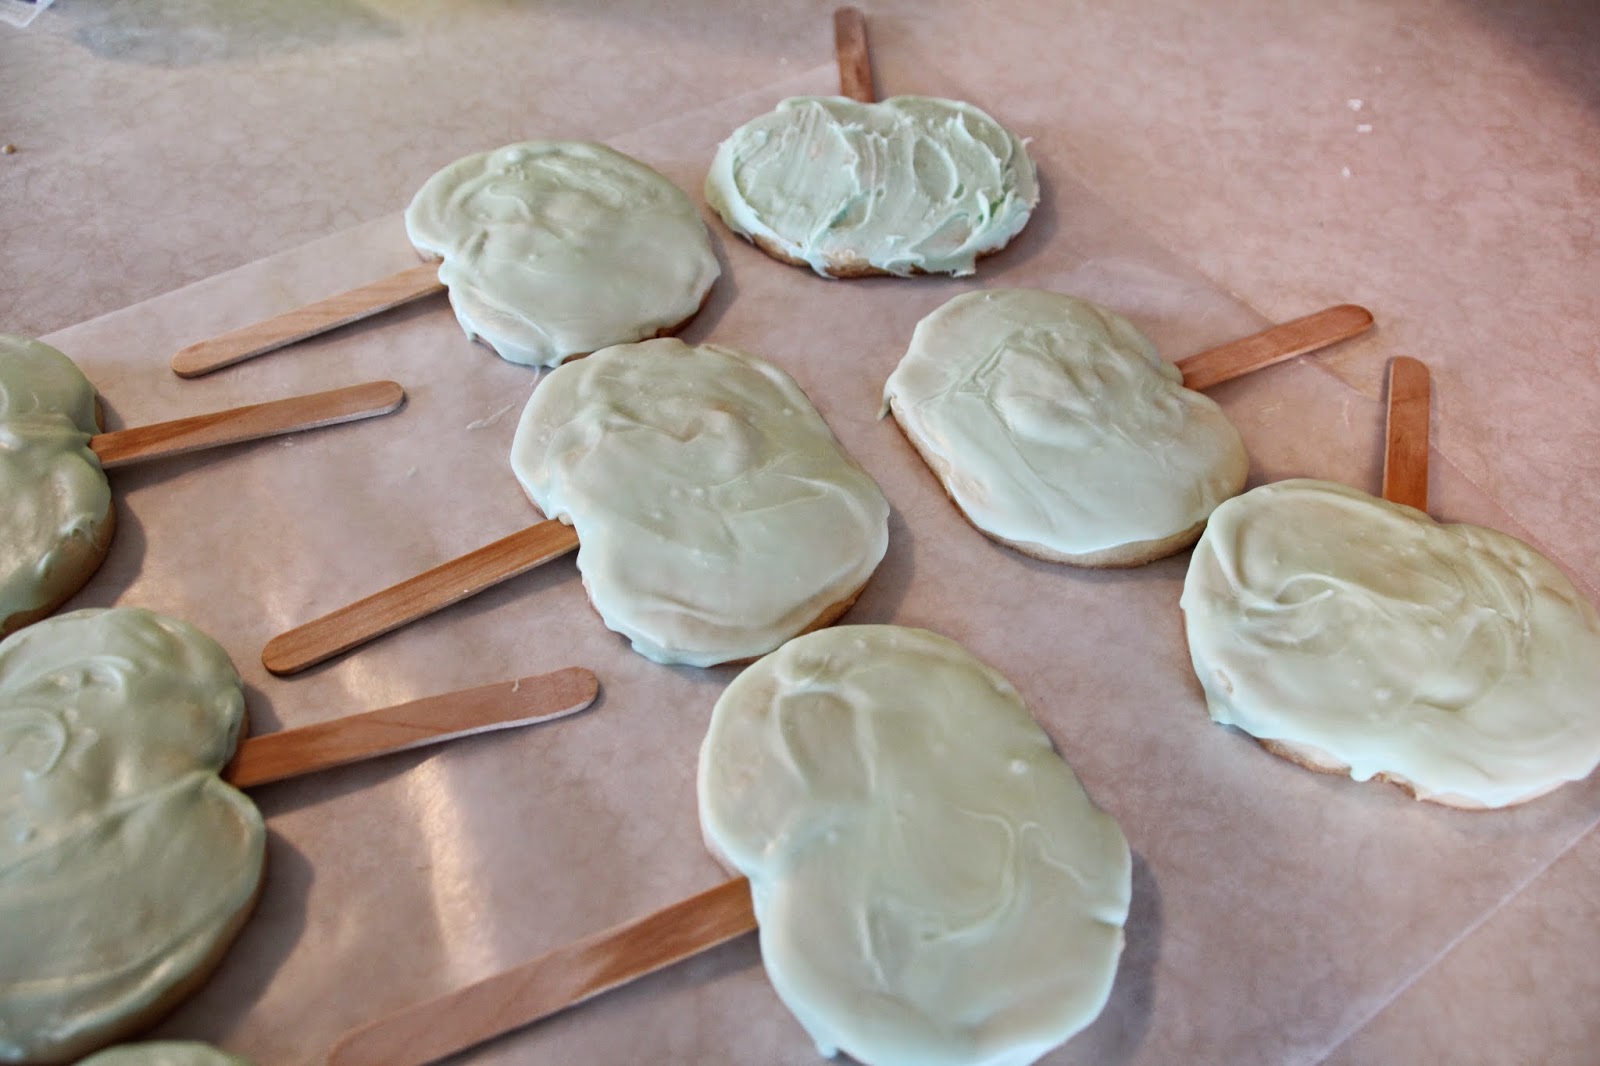
Place the cookie on a cooling rack that is set inside a cookie sheet or over wax paper.  Lightly hold the cookie in place and tap the rack on the counter.  The bark will smooth out with each tap. If you don't see this happening, (You can see the cookie in the top corner is not smooth) check to make sure the bark is not too cold to smooth out and reheat for 10 to 15 seconds to warm it to the right consistency.Set these on  wax paper to cool and become firm.


Now melt some good quality caramel in the microwave the same way you melted the bark.  Stirring after each 15 to 30 second heating.  You want the caramel to be totally melted but as before only just to the point that this happens so that it is warm, not hot.  It will melt the bark and slide off the cookie if it is too warm. 
Now holding the cookie over the bowl of caramel, use a fork to dip out some caramel and run the caramel slowly over the bottom of the cookie. 
Don't worry if it covers the area you want completely.  When it is mostly covered, use a buttered knife to pat the caramel smooth.  Immediately sprinkle crushed Hersheys Brickle bits onto the caramel and set on wax paper to dry. 


caramel apple cookies

Soooo Cool!


This recipe was inspired by Wilton's
Caramel Apple Cookies
This was shared on these wonderful sites!
The Country Cook
A dish of Daily Life
Mandy's Recipe Box
Foodie Friday

Inspire Me Monday
Lou Lou Girls
Memories by the Mile
Pint sized Baker
Nap Time Creations
Meatloaf and Melodrama 
SITS Sharefest 

Monday, October 13, 2014

Winter Fruit Salad

Creamy berry salad


I call this my winter fruit salad because it is made from ingredients you can buy year round.  Because of the miracle of interstate shipping and trading we can get frozen berries and fruit year round.  This is a simple and fast recipe you can mix up in a few minutes and maybe bring a little of that summer feeling into your winter days!  Thanks to my daughter in law Brittany who gave me this recipe.

Winter Fruit Salad

2 boxes of Instant cheesecake (or 1 cheesecake and 1 white chocolate) Pudding Mix
1 - 8 oz. thawed whipped topping
1 quart (32 oz) Vanilla Yogurt
2 lbs frozen berry mix (I used Walmart's Triple Berry Mix and added frozen
blackberries too)

In a large bowl combine the whipped topping, vanilla yogurt, and powdered pudding with a whisk.

Keep stirring, (whisking is that a word?)  until the pudding is dissolved and smooth. 
I usually take my frozen berries and thaw them about 1/2 way in the microwave, stirring them carefully through the process so they are uniformly thawed.  I stop when they are still a little frozen so they don't turn to mush when they are stirred into the salad.  Gently fold the berries in to the cream mixture until they are evenly spread out.
  You can eat it immediately but I like to put it in the fridge for at least a few minutes to set up.  This is sooo creamy and good!
whipped cream salad
This was shared with the following wonderful sites!
Lou Lou Girls
a Dish of Daily Life
The Country Cook
The Sits Girls

Monday, October 6, 2014

Easy Peasy Butterfinger Bars--Quick and Easy!


homemade copy cat Butterfinger bars
Are you looking for a Halloween Treat that is fast AND easy?  Just keep reading and check out this recipe.  This recipe is from Six Sisters Stuff. This is about the easiest recipe you will ever make.  Just look at this:

3 Ingredients:

16 oz. candy corn
16 oz. creamy peanut butter
16 oz. chocolate candy coating or chocolate chips

Melt the candy corn in a microwave safe dish first.  Place it in bowl and heat on high for 1 minute.  Stir it.  If it is not smooth continue heating for 15 second intervals until all lumps are gone.  Stir in the peanut butter.  This may look strange and bumpy but keep stirring until all the candy corn is dispersed throughout the peanut butter. Now spread this into a 9 x 9 pan that has been lined with parchment paper.  Leave the extra paper hanging out over the edge while it cools.  You can leave it on the counter to cool or place in the fridge.  I left mine on the counter because it was still soft enough to cut when it was cool.  

Take this out of the pan by lifting the corners of the parchment when cool and cut with a pizza cutter into the size bars you want.  

Melt the chocolate following the package directions in a small bowl or cup just large enough to dip your pieces in.  I use a fork to lower them down into the chocolate and then tap this on the side of the bowl as I take them out to remove excess chocolate. 

 Now place on a parchment lined cookie sheet and let them set up.  I found that they are really good this way but when I put them in the fridge to get cold they were crunchier and over the top delicious!   Enjoy!! 

This recipe was shared on the following wonderful sites:
Pluckys Second Thought 
Yesterfood 
Create with Joy 
Mandy's Recipe Box 
Pint Sized Baker
Naptime Creations
Lou Lou Girls 
Kitchen fun with my Three Sons 
The Country Cook